Understanding NOMAD Schemas
This guide provides a detailed reference for navigating and using NOMAD schemas. Schemas are structured data templates that organize your experimental information consistently, enabling powerful search and analysis capabilities.
What are Schemas?
NOMAD schemas define the structure of your data entries. They specify:
- Required and optional fields for your measurements
- Data types (numbers, text, references, etc.)
- Relationships between different entities (samples, processes, measurements)
- Validation rules to ensure data quality
Creating a Schema Entry
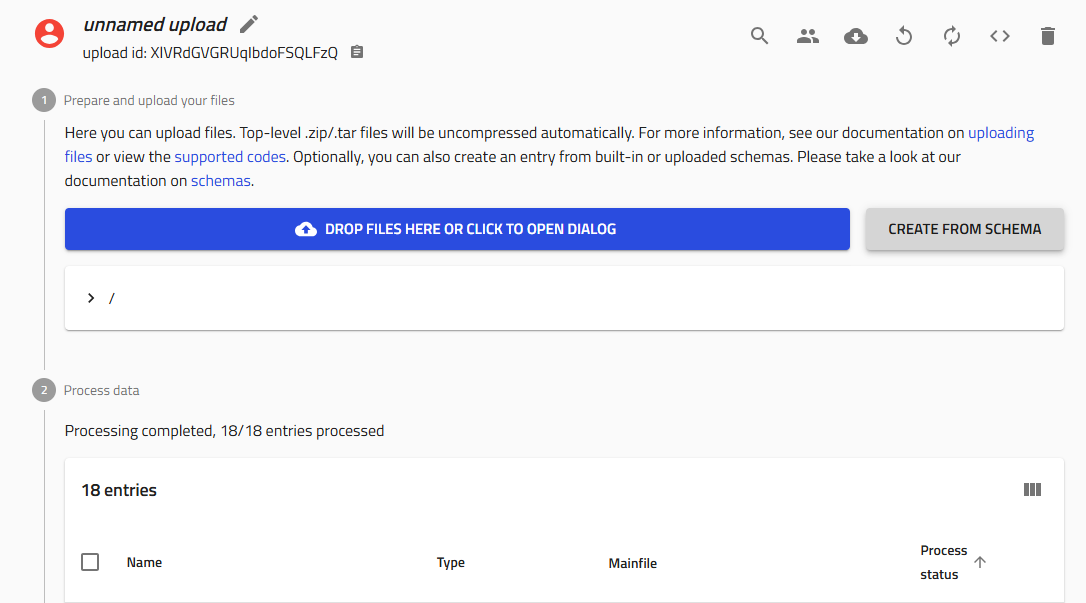
Step 1: Access the Schema Creator
-
Navigate to your upload in NOMAD Oasis
-
Click the gray "Create from schema" button
Step 2: Select Your Schema
A pop-up window appears with:
- Text field: Enter a descriptive name for your entry
- Dropdown menu: Select the schema type
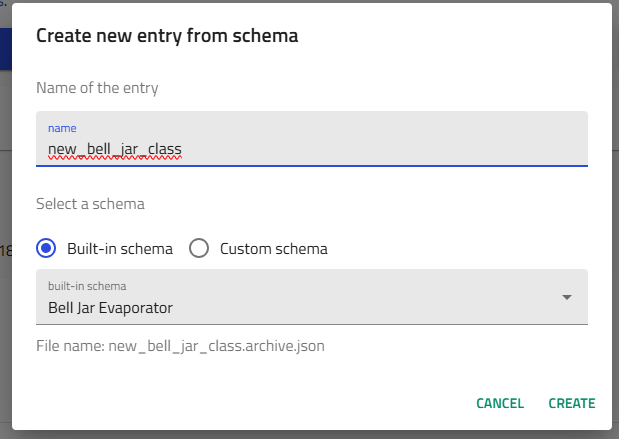
Naming Convention
Use descriptive, systematic names that include:
- Your username/initials
- A sequential number
- Material or process information
- Specific identifiers (position, type, etc.)
Example: amazingresearcher_0042_CuZn_BL_Sputtering
Step 3: Open the Schema Interface
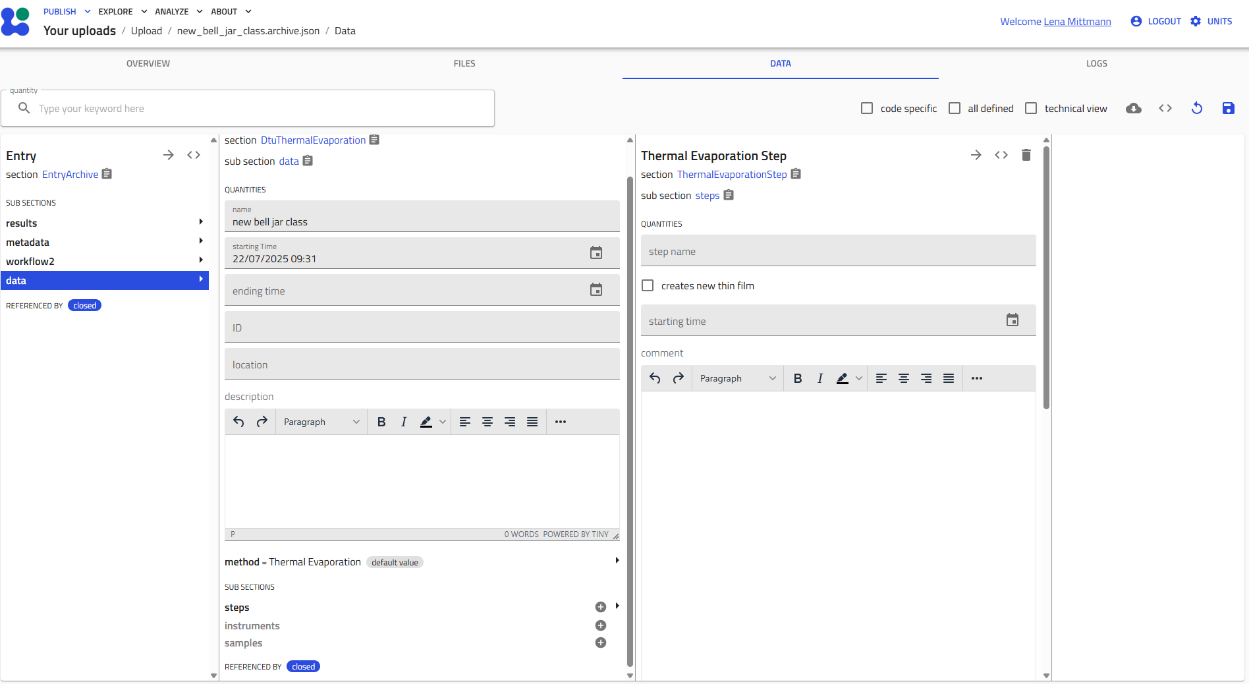
After selecting a schema (e.g., "Bell Jar Evaporator"), the structured data entry interface appears.
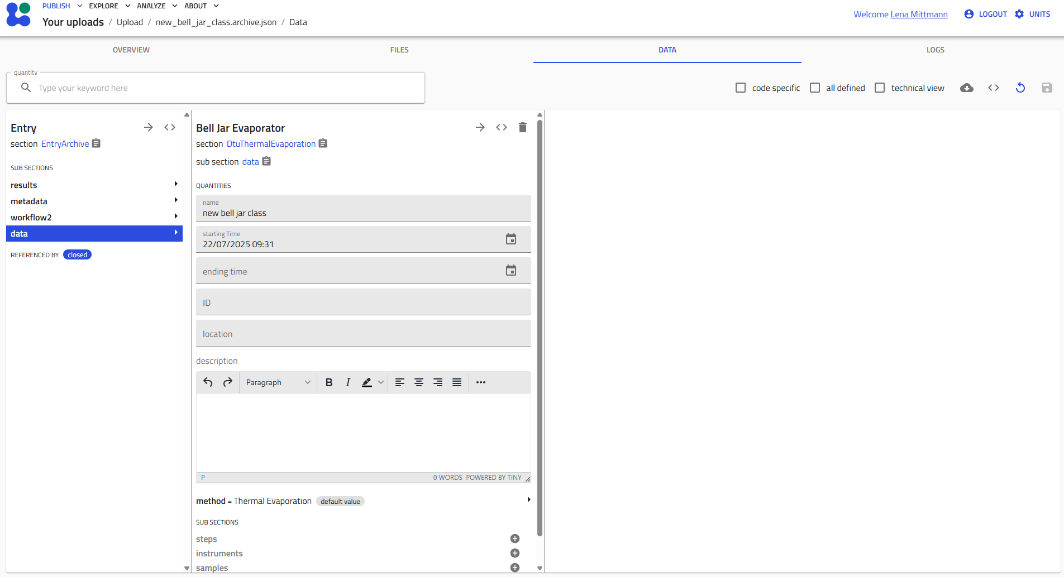
Navigating the Schema Interface
Editable Fields
- Gray/highlighted fields can be edited
- Click on a field to enter data
- Different field types:
- Text boxes for free-form input
- Dropdowns for predefined options
- Number fields with units
- Date/time pickers
- File upload areas
- Reference fields to link other entries
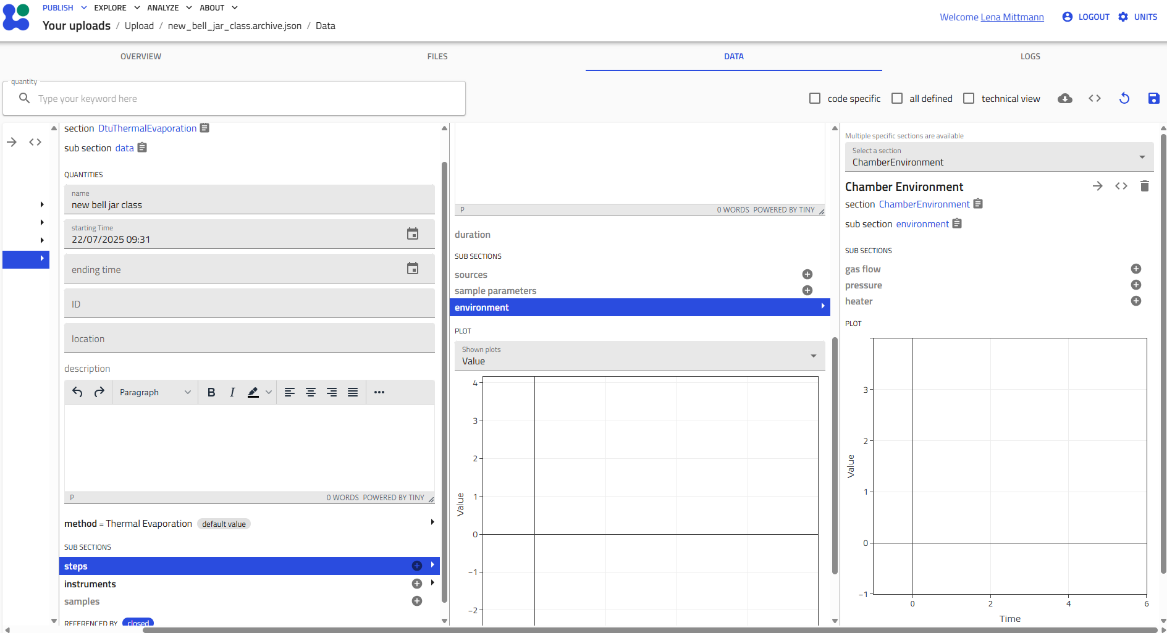
Subsections
Subsections organize related information hierarchically. They are indicated by headings with expandable "+" icons.
Working with Subsections
Adding a Subsection
Click the gray "+" icon next to a subsection name to create an instance.
Once added, the subsection expands to show its fields and nested subsections.
Nested Subsections
Subsections can contain other subsections, creating a hierarchy that mirrors your experimental workflow.
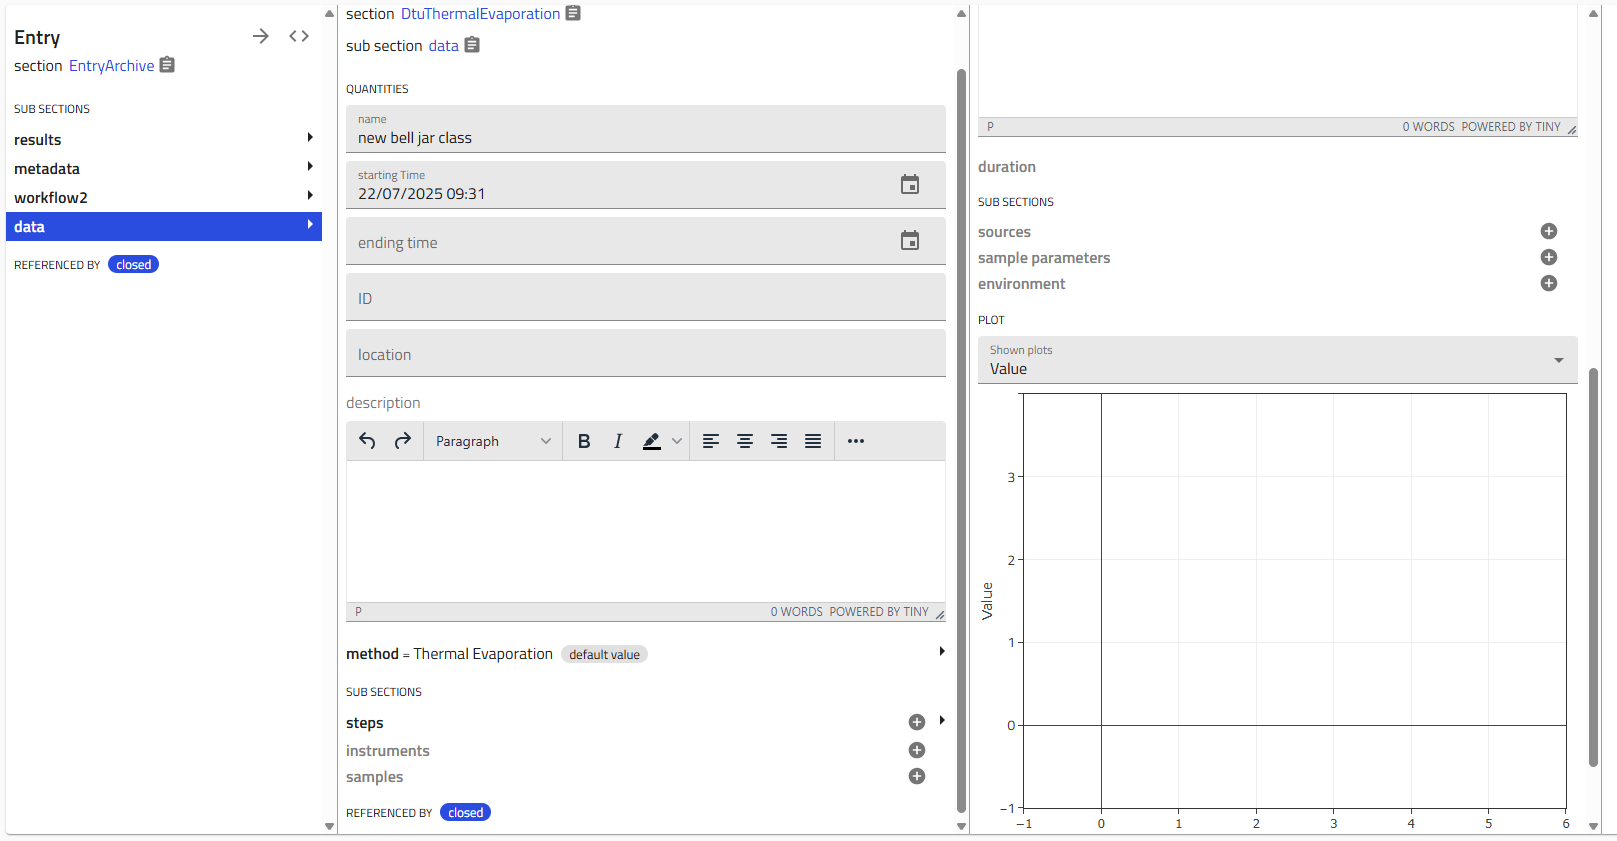
For example:
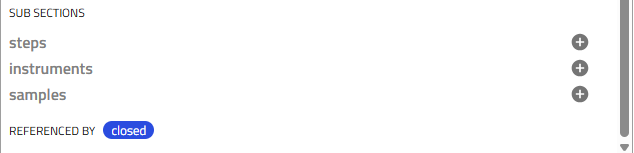
Single vs. Multiple Instances
Subsection Types
Single Instance Subsections
- Allow only one instance
- The "+" icon disappears after creation
- Example: "Environment" - one environment per step
Multiple Instance Subsections
- Allow multiple instances
- The "+" icon remains after creating instances
- Example: "Steps" - multiple steps in a process
In the image above:
- "Environment" (blue box, top) - the "+" is gone (single instance only)
- "Steps" (blue box, bottom) - the "+" remains (can add more steps)
Viewing Multiple Instances
When you create multiple instances of a subsection, they appear in a list.
To view the list:
- Click on the subsection name to expand it
- All instances are shown with their names or numbers
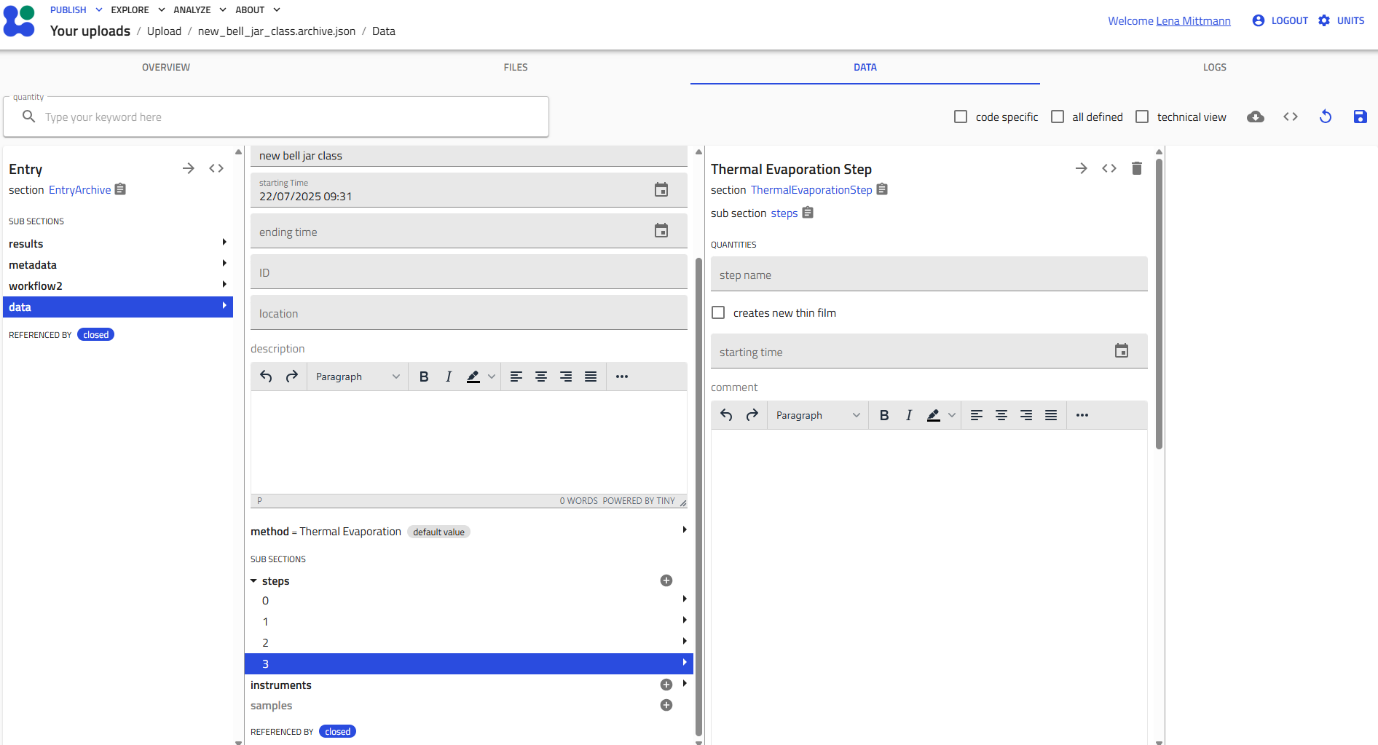
Instance identification:
- If you named the instance (e.g., "Heating", "Cooling"), that name appears
- If unnamed, instances are numbered consecutively (1, 2, 3, etc.)
Naming Instances
Always name your instances descriptively! It makes navigation much easier when you have many steps or measurements.
Best Practices
Systematic Data Entry
- Work top to bottom - Fill in mandatory fields first, then add subsections
- Save frequently - Use the "Save" button regularly to avoid losing work
- Use consistent naming - Follow your lab's naming conventions
- Document thoroughly - Use free-text fields to add context and notes
Data Quality
- Complete required fields - Marked with asterisks or red indicators
- Use correct units - Pay attention to dropdown unit selectors
- Validate references - Ensure linked entries (samples, substrates) exist
- Review before finalizing - Check all entries are correct and complete
Efficient Navigation
- Collapse completed sections - Click section headers to hide/show content
- Use browser search (Ctrl+F / Cmd+F) to find specific fields quickly
- Bookmark frequently used schemas - Keep links to common entry points
Common Schema Types
The DTU Nanolab plugin provides schemas for:
Entities (Lab Inventory)
- Samples & Combinatorial Libraries - Track composition gradients
- Substrates - Silicon wafers, glass, etc.
- Targets - Sputtering targets with composition
- Gas Supplies - Process gases
- Instruments - Equipment tracking
Activities (Processes & Measurements)
Synthesis & Processing:
- Sputtering Deposition
- Thermal Evaporation
- Rapid Thermal Processing (RTP)
- Library Cleaving
Characterization:
- X-ray Diffraction (XRD)
- Energy-Dispersive X-ray (EDX)
- X-ray Photoelectron Spectroscopy (XPS)
- Photoluminescence (PL)
- Ellipsometry
- Raman Spectroscopy
- Resistance-Temperature (RT) Measurements
Analysis:
- Jupyter Analysis - Computational notebooks
Troubleshooting
I can't find the "+" icon
The subsection may only allow one instance, and you've already created it. Check if the subsection has expanded content below.
My entry won't save
Common causes:
- Required fields are empty (check for red indicators)
- Invalid data format (e.g., text in a number field)
- Missing required subsections
- File upload in progress
I accidentally deleted a subsection
Unfortunately, deletions are immediate. You'll need to recreate the subsection. Save frequently to minimize potential data loss!
The schema doesn't match my process
Schemas are adaptable! Use:
- Free-text fields for additional notes
- Custom subsections if available
- Contact the plugin maintainers to suggest schema improvements
Related Resources
- Use This Plugin - General usage guide
- Upload Sputtering Data - Specific workflow example
- Data Model Philosophy - Why schemas are structured this way
- Schema Reference - Detailed field documentation
Need Help?
If you encounter schema-related issues:
- Check this guide for solutions
- Ask colleagues who have used similar schemas
- Review the Reference Documentation for field-specific details
- Contact the DTU Nanolab NOMAD support team